Showing posts with label Crafts. Show all posts

Sunday, 10 July 2016

Scarf or Shawl?

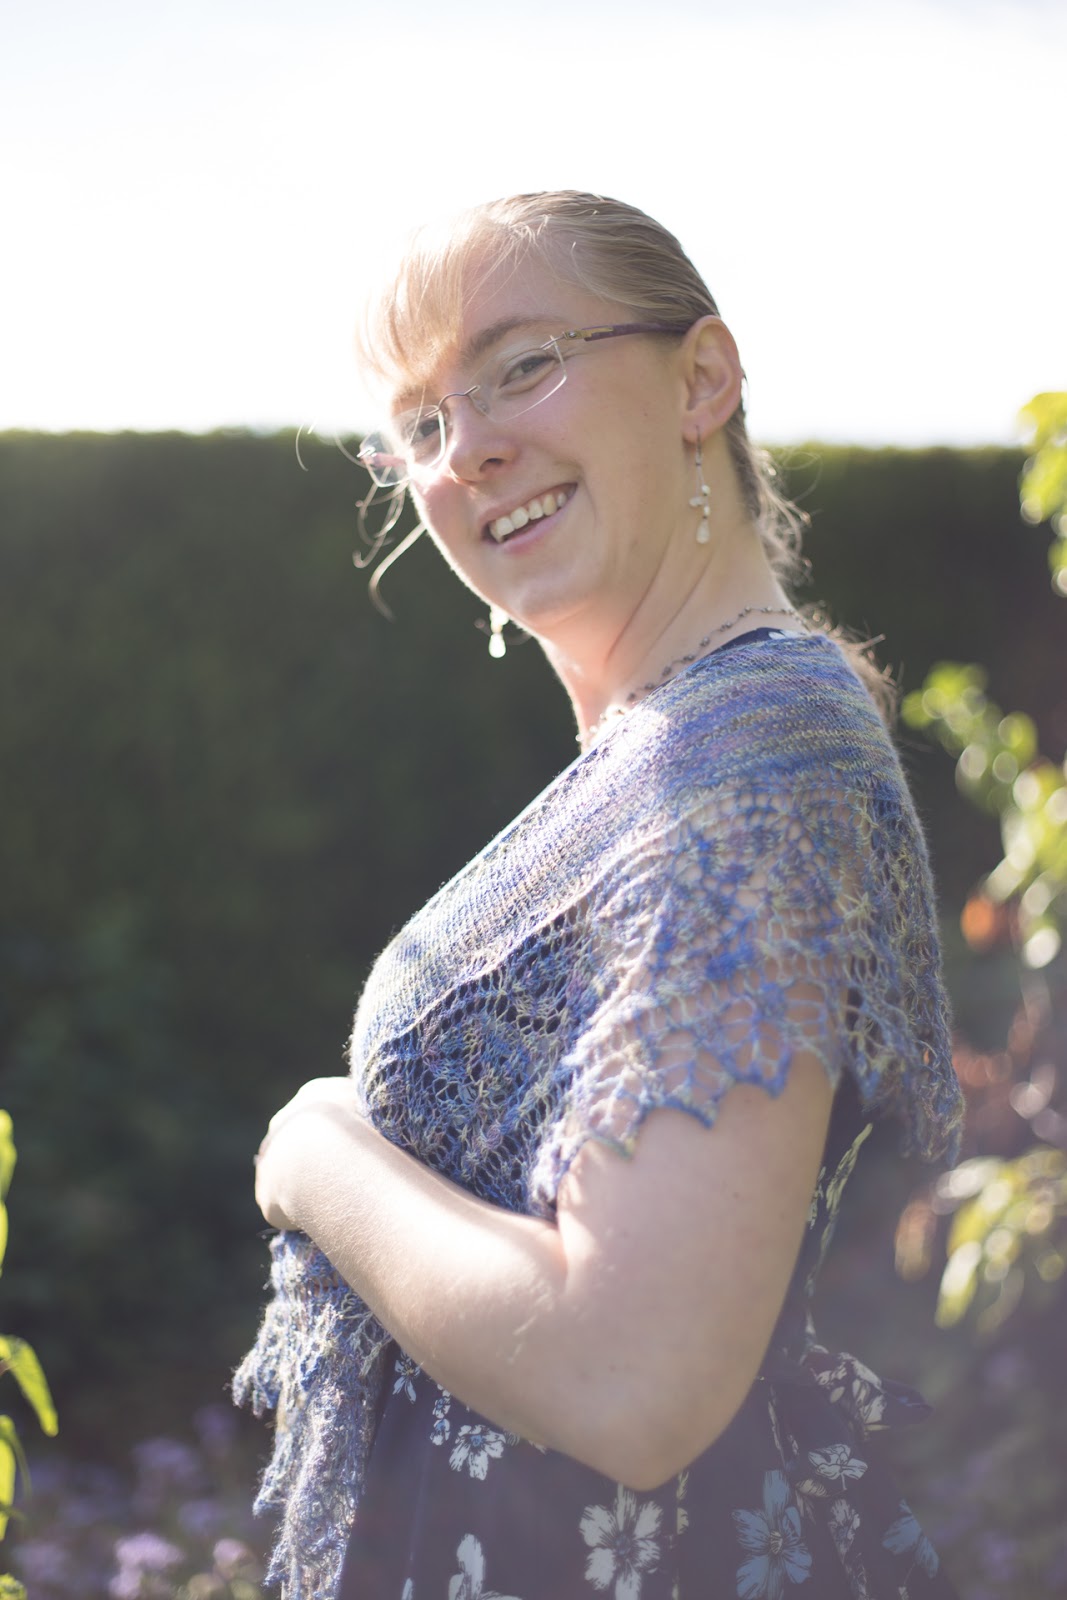
My Regina Marie shawl is now completed. I'm really happy with this one; it's come out pretty much as I hoped for, the yarn has been great to work with and is still beautifully soft.


I made a couple of tweaks to the pattern as I wanted something that was more scarf than shawl; long and thin. Firstly I went for 32 repeats of the main pattern block, rather than 26. I wish I'd been braver and gone even further with that as I still had yarn left at the end, though I'm not sure an extra couple would have made much difference.


Then during the short rows section I knit four stitches beyond the gap on each pass so that I consumed the stitches more quickly to create a thinner crescent.


I don't know what the technical definition of a scarf vs a shawl is - but whatever it is I've made I love it.


Read More

Sunday, 12 June 2016

Regina Marie

A little over a year ago now I received a gift of what has to be the softest skein of yarn I've ever had the delight to knit with; Manos del Uruguay Lace. 70% alpaca, 25% silk, 5% cashmere. Beautiful.


I've been looking forward to working with this yarn ever since; giving it a quick squeeze every time I've had an excuse to go into that box. I wanted to make something that would be worn against the skin and have debated many scarf and shawl patterns, but it was only when I saw Araignee's Regina Marie project taking shape that I thought I might be onto a winner.

It had to be a "one skein" project - because that's what I had. I also wanted something that was generally long and thin in shape so that it could be worn more as a scarf than as a wrap, and Regina Marie met both of those criteria. I also liked the way the lace work weaved in and out of itself along the edge. Araignee's assurance that this was a lovely pattern to knit sealed the deal.


And she was right. It's coming together really nicely. I have a little more yarn than the pattern calls for so I'm thinking about following the instructions to make it longer - but I'll see how if feels once I've done the required number of repeats... but now I need to go and knit just a little more!


Read More

Sunday, 22 May 2016

Is it socks again?

I often take my knitting out and about with me, in the car, to friends houses, on holidays and day trips. When people spot me quietly adding a few stitches to my work in progress this naturally this sparks the question "what are you making?". Nothing unusual there. Of late though I've noticed that this is sometimes followed with the second question "is it socks again?!".

Why yes, yes it is. Socks, socks and more socks. They're certainly not the only thing I knit but it seems every time I finish another project and I hit that lull where I'm just not sure what to make next socks are always the answer. Small, useful, portable projects with endless possibilities to be tried. I think the real trick though is that they take a relatively standard weight and thickness of yarn so I never have to worry about getting the right pattern/yarn combination, I can just grab a ball from my box, find a pattern that tickles my fancy and away they go. 

Where they're all going though I'm not sure as I still only have one pair of hand knitted socks to call my own, so my latest pair - these ones are for me.


Pattern: It's Tea Time from Around the World in Knitted Socks by Stephanie Van Der Linden
Yarn: West Yorkshire Spinners Signature 4ply in Nutmeg.
Read More

Wednesday, 13 May 2015

How Not To Design A Knitting Pattern

Over Christmas I started knitting something new. Not just a new project. Not just a new yarn. I started to make up a new pattern. Obviously (I say obviously - turns out this was only obvious to me in hindsight) this hasn't been as straight forward as just knitting from someone else's pattern; I'm trying to design some gloves, and am pretty sure I've gone about it all the wrong way. There are plenty of guides out there on how to write a knitting pattern, but from my limited experience I give you:

How NOT To Design A Knitting Pattern

1. Guess

If you're trying not to design a knitting pattern then guessing is a great way forward. Need to know how many extra stitches to add as you work the base of your thumb, and how many rows you need to increase those stitches over? Don't take any measurements and definitely don't work out your gauge. Guess! That way you can have the joy of knitting your thumb many times over.


2. Be Indecisive

You may have a rough idea in your mind how this might look and that's plenty to get you started. By no means should you swatch variations on your pattern to see how it affects the look before you start knitting properly. When wondering whether the pattern would look best over 30 stitches or 40 its best to not decide until you're part way through making the finished article, and then to go for 35 instead.


3. Design purely for you

Because if it fits you, of course it will fit everyone else. No thought at all is needed on how to produce different sizes or shapes to suit different people.


4. Just Start Knitting

There's nothing more conducive to getting the design right than thoughts of "I've just come up with a new way to do this, but that would mean undoing what I've done". Having a half finished project on your lap will always inspire you to stick with what you've got rather than making the right decision - perfect for the non-designer.


5. Don't knit at all

Finally, ignore your new pattern design. Don't think about it for months at a time. That way the fairies will come and design it for you. Guaranteed. Knit a jumper instead.


P.s. Yes, I've done all these things. Yes, it could be a while before this is an actual pattern. I now have a glove that might one day have a matching pair, was reworked many times in getting this far and is wonderfully soft and warm. It might also one day resemble the final pattern. I'm now going to take some measurements, knit some swatches and remember that I have an engineering degree - logic should be my forte, not an afterthought (I blame Christmas)! Shame it's no longer really glove weather, maybe I'll just knit something else... just for a little while of course...
Read More

Wednesday, 29 April 2015

Big Cables and Little Ones Too

Finished!

All done, it took a little longer than hoped, but then life has been busier than planned. The pattern was very straight forward to follow and well written, the yarn is lovely; soft and cosy, and its a nice fit. What more is there to say, except perhaps, what's next?


I'm definitely a one project at a time sort of person. My knitting time is limited and the busier my knitting bag is the less time each thing gets. For the most part I'd rather work on one thing and have the satisfaction of a finished project, than to try and complete lots of knits at once.


Except when a more exciting project comes along. Then, for example, I might finish a jumper and discover half a glove in the bottom on my knitting bag. Shame it's not really glove weather anymore isn't it?


Read More

Wednesday, 8 April 2015

Sleeves... there should be two!

We seem to be having a little blogging crisis at the moment. It's a bit frustrating really, having (reasonably) happily written three posts a week since we started nearly two years ago suddenly we're missing out posts left, right and centre. The reality is that time just seems to be running away with us, another Wednesday, another Sunday and - oh look, it's Wednesday again.


One thing I have been ticking over recently is my jumper. I've finished the body and have started to crack on with the sleeves. I'm itching to start another project, but masterfully resisting on the basis that otherwise this one will never get finished.


 Another couple of days like the last few though and I'll be almost there. I seem to have managed a sudden burst of speed and slightly suprisingly I'm half a sleeve closer...


Read More

Wednesday, 4 March 2015

Meanwhile, in Knitting News

The bathroom has been all consuming of late, but I've been trying to find time each day to put a few more stitches on my Big Cables and Little Ones Too jumper as well.


I've now separated the body and the sleeves and having less stitches to deal with is giving me the illusion of speeding up. I know I have to go back and deal with the other stitches later but I'm content with the fantasy for now.


Having finished the garter stitch yoke has actually sped things up though. Try as I might my purl stitch is still definitely slower than my knit and round after round of stocking stitch is now flowing rather nicely.


All the cables have now "disappeared" so its simply knit knit knit for the time being which is just right at the end of a busy day.


Read More

Sunday, 1 February 2015

Should keep me out of mischief...

I have great hopes that this will be the Year of the Jumper. Joe has a project plan up his sleeve which we'll hopefully let you know about in due course; meanwhile I've started on my third ever hand knit jumper (first and second) and I'm really happy with how its going.

There's the soft, purple, wool that's proving really nice to work with. This is Sirdar Snuggly DK and was a christmas present.


It's a pattern that requires some concentration but not too much. I've gone for Baby Cables and Little Ones Too for this project, and at the moment I'm working through the garter stitch yoke with the cables in various shapes and sizes. I'm hoping the endless rounds of stocking stitch that I know are coming up will provide great knitting for when I don't want to have to concentrate at all too.


Finally it's my first top down sweater meaning I can try it on and get excited about progress probably more often than is strictly necessary. Unfortunately I'm finding the size of the needle restricts trying it on properly without transferring it onto waste yarn, but that doesn't stop me trying!

Read More

Sunday, 14 December 2014

Homespun Hat

When we got home a couple of weeks ago I had nothing on my needles and was on the hunt for a project. I had two criteria for a new knit - it had to be the compete antidote to thin and lacy, and it had to be simple enough to do while tired from travel. Actually tired doesn't really cover it - for some reason this final leg has really knocked me for six. Essentially this project had to cope with me falling asleep on the sofa halfway through a row without causing complete confusion!


The yarn was an easy choice. Last christmas Joe spun up some bulky yarn that I've had my eye on for a while. It looked about enough for a hat, and Jake's Cabled Beanie was the answer to the pattern. A simple hat with a few cables for interest; bonus points for wintery-ness.


Despite the general sleepiness it only took a few evenings to complete and proved as easy as it looked. The only question left is should I add a pompom?
Read More

Wednesday, 10 December 2014

Vernal Equinox Shawl

Its time to reveal the results of my Travel Knitting plan. My Vernal Equinox shawl has been finished, for the most part, for about a month now - but only this week did I get a chance to block it and boy does that make a difference!


I loved making this shawl - it was always interesting to work on, and just when you think you've memorised one of the pattern blocks a new one would come along to spice things up a bit. Only when tired at the end of a days WWOOFing did this fail to hit the "something to relax with" spot - and that just meant more time to read!


A large quantity of laceweight wool did prove to be the ideal travelling companion. The 300g we took with us made not only this shawl but Joe's loopy scarf, and a simple feather and fan cowl that occupied me once the shawl was done - and we brought some of the wool home again untouched.


I've not knitted with such thin wool before, or attempted lace on such a scale and I've thoroughly enjoyed the challenge - but it has left me with a craving for some knitting that's neither thin nor lacy. One chunky hat coming up...


p.s. I have no idea how best to wear this thing... any tips?
Read More

Wednesday, 12 November 2014

A Loopy Knit

Shortly after we left our WWOOFing hosts for our tour of New Zealand, Joe decided that he was feeling devoid of a project with which to relax. Noticing that I had progressed far enough through my shawl to prove that I didn't need all three of the balls I'd brought with me, he requisitioned one, plus a spare needle and set about finding an appropriate pattern.


He choose a scarf with an interesting lacy panel, comprised of not one, but four yarn overs which are promptly dropped on the next row to create a very open set of stitches. Once the scarf was long enough - and in this case that meant around 100 inches of scarf - he then set about adding tassels to both the ends of the scarf and along the length of the body for a sheekishly scruffy look. 


It still needs a block which will probably wait for when we get home, but otherwise it's all finished; a nice little travelling project.


Read More

Wednesday, 5 November 2014

A Guide to Papercutting

I've mentioned paper cutting a few times around here, but often just in passing. As this is something I've grown to love over the last couple of years and have used to make more cards than I can now remember, I thought I'd share with you a guide to my technique - if you can call it that! I'm by no means an expert, and often find myself in awe of some of the delicate pieces of art that can be made out of a simple sheet of paper. Maybe one day I can aspire to more intricate pieces but I think the process I go through here would work on any level, the trick comes down to your design skills and the nimbleness of your cutting.

I use a scalpel for cutting with, along with other drawing tools. 
There are two main ways of creating an image using papercutting - from the positive space or the negative space. For example the owl and flower shown here are created from the negative space (i.e. an owl shaped hole in a piece of paper), whereas the labels are created from the positive space (i.e. the paper is cut away to leave the letters behind). Both can work really well, but it's worth considering from the start which one you're going for as it will affect the way you create your design. Of course you can use both in one piece of art.

I started by defining a border so that my flower would have somewhere to connect to the rest of the card.


1. Start by sketching out your idea. Often at this stage I only have the loosest plan of which bits I'm going to cut out - this is all about having a viable drawing to kick things off. If I'm creating a picture using positive space I'll usually start by marking out a border as then I can make sure my picture touches it in multiple places and is therefore anchored into the rest of the sheet.

I do all my sketching on the back so that I don't need to remove all pencil lines at the end.

2. Once I have my sketch I start working out which pieces I'm going to cut away to create the effect I want. I go over these areas in a bolder pencil line until I'm happy with the design making sure all the details have been picked out. What I'm left with is a series of "holes" and "islands". It's worth checking at this stage that all the islands are connected together, preferably at more than one point for stability.

Building up layers of pieces to cut...

... until all the details I want are picked out.

3. Next it's simply a case of taking a craft knife and cutting away the sections you've marked out. I always try and cut the holes that will create the most instability last - in the case of this flower starting with the inside petal and finishing with the gap between the border and the flower at each point. This is because the thinnest points are when each petal meets the border so I wanted to put these under the lowest amount of strain.

I always work my way methodically round a piece, rotating my paper as I go...

There are three main mistakes I find I frequently make when papercutting:


1. Bad Design: I've created a design where the parts aren't all as well connected as I thought they were and as I'm cutting it falls apart. The only thing to do here is start again, or - depending on what's gone wrong - salvage the rest of it sans the part you've cut away.

2. Cutting through an island. Sometimes you're cutting down a nice long straight or curve and you slip... straight into the next hole. I find this is most likely to happen when my blade is a little dull and I'm having to put more pressure than normal on the knife to achieve the cut. Simplest solution - put a fresh blade on your knife.

Only creating the thinnest part when everything else nearby has been cut...

3. Tearing a part you've previously cut carefully. If you have a specially delicate part of the design you'll often find that it rips as you're cutting somewhere else. The knife has a certain amount of drag and friction to it and this pulls at the paper as it cuts. Partly this is solved by leaving these sections to the end, but what I also do is pin down the paper just above where I'm cutting so that my finger takes the strain, not the paper, paying particular attention to pinning down nearby danger spots.
Here I'm using the middle finger of my left hand to pin down the card just in front of where I'm cutting.

You're done! There's not much to it - just lots of patience and a steady hand.


Finally I add a contrasting colour behind to show off my cut and if a design works well I do it again and everyone gets one!


Read More

Wednesday, 29 October 2014

Pots from Old Jeans by Wendy

I'm very proud to say that I am Joe's mum and fortunate that Jenny is now part of our family. Joe's old bedroom is now a guest room ( with a fold down bed made by his dad ) and my workroom were I can surround myself with fabrics and be inspired.

This week I have made a couple of fabric storage pots from the legs of old jeans. One pair were black the other standard blue ( slightly harder to sew as they are stretch ones). I tried to find some with the least flare from my box of discarded jeans. 


I used an 8 inch section from a leg plus a circle. If you can't cope with working out how big to cut the circle, by measuring across the leg x 2 to get circumference and doing the maths, try putting "circle calculator" into Google and it will work out the maths for you. Do remember to measure the denim tube along the seam allowance not the bottom raw edge and add the same seam allowance to the circle either on the pattern or as you cut it.


For the lining I used some cotton fat quarters from my fabric stash and some extra firm heat and bond interfacing. I would normally iron the interfacing to the outside fabric but I did not want to unpick the side seams so fused it to the main body of the lining on the sides but to the denim on the base.


Folding the lining fabric and placing the leg section on top, so one side of leg is along the fold, I cut out the lining the same size at the top and bottom but leaving a seam allowance down the side which I marked with a prym trickmarker. This seam was then pinned and stitched.

This tube was attached to the denim tube ( wrong sides together ) at one end. Pulled right side out and pressed, then top stitched on the denim through the layers of the seam.


The base circle of denim and a matching circle cut out of the lining were pinned then machine tacked together. I marked both the circle and the denim end of the tube in 4 equal places along the sewing lines ( not the edges) to help join them together. I pinned then machined along the stitching line twice to make it strong. You may need to tack it first to ensure you don't get pleats or puckers.


Clip the curves then fold the lining down the sides and ladder stitch into place by hand.


Turn right side out and fold down the cuff.


Read More